Latest Article Get our latest posts by subscribing this site

ORANGE SMOOTHIE

ORANGE SMOOTHIE


Ingredients

  • 3 Oranges
  • 1/2 c Coconut Milk (canned)
  • 1/8 c Raw Honey (optional)
  • 1 tsp Vanilla
  • 1 c Ice

Cooking Steps

Peel your oranges and place them in your Vitamix or other high speed blender. Add coconut milk, honey, vanilla, and ice. Blend all ingredients at high speed until well blended. Voila! Here is your delicious and healthy smoothie! You may even add your favorite protein powder to this drink.

Craving Dessert?

Easy RAW Apple Pie


Easy Raw Apple Pie!

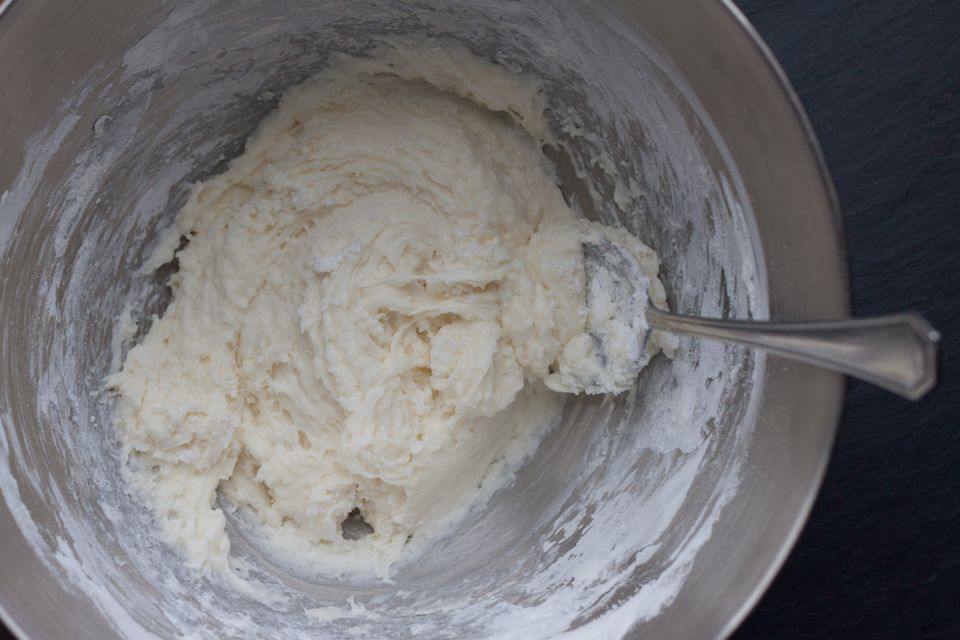
This apple pie is a seasonal favorite. Try this out over the holidays or anytime - because it’s that good!

Easy Raw Apple Pie

Ingredients

For the filling
  • 8 medium apples
  • 10 medjool dates, pitted
  • 1 tsp cinnamon (to taste)
  • 1 tsp pumpkin pie spice (also known as mixed spice)
  • 1/4 tsp ginger powder
For the crust:
  • 1 1/4 cups walnuts
  • 1 1/4 cups pecans or almonds
  • 1/2 cup medjool dates, pitted
Directions

1. Divide the apples into two piles – one of 5 apples and one of 3 apples.

2. Peel, core and chop all the apples into rough chunks.

3. Place 5 of the chopped apples into a food processor and process until the apple is in small, chunky pieces. Remove and place in a large bowl.

4. Place the remaining 3 chopped apples into the food processor with the dates and spices. Process until it forms an apple sauce.

5. Mix the apple sauce with the chopped apples.

6. Place the nuts and dates for the crust into the food processor and process until sticky.

7. Spread the crust mixture into a pie/tart pan, using your fingers to press it down around the edges. 
Spoon the pie filling onto the crust and flatten with the back of a spoon or spatula. Chill.

8. Decorate the pie with a few more nuts, apple slices, some fresh berries or make some cashew cream for even more decadence 

Top 7 Essential Oils for Pain

Top 7 Essential Oils For Relieving Your Pain

http://www.revitaliseyourhealth.com/top-7-essential-oils-for-relieving-your-pain/
essential oils for pain
  Using essential oils externally can ease pain from many causes including muscle tension, neuropathy, migraine, and inflammation. There are many helpful oils, so even if you happen to be sensitive to one, there are many other options to try. CAUTION: Never use a pure essential oil on your skin, and even blends should be kept away from the eyes. Most essential oils are very strong and must be diluted with a “carrier oil” before use or they will cause burns. (Lavender and tea tree essential oils are among the very few that are safe to use undiluted.) Essential oils should never be taken internally, they contain extremely concentrated amounts of the active compounds of the plants they have been extracted from and can be toxic if taken internally.


 The are many methods of using aromatherapy to ease pain, and essential oils are useful in many different kinds of pain management, and for many different types of pain. Essential oils can be used in massage oils to increase the pain-relieving and relaxing effects of the massage, in bath salts or oils, or in pain relief creams and lotions. Whether purchased in prepared products or as the pure oil and then prepared at home, essential oils are a wonderful addition to your pain management program, and can reduce your need for prescription pain medications. The following list provides a few of the most useful oils, and their most common uses for pain relief.


 LavenderLavender oil is relaxing, pain relieving and antimicrobial. Inhaling the vapors; either directly from the bottle, or diffused into the air through the use of a diffuser; relieves stress and helps reduce muscle tension, both of which increase pain levels. It can also help ease pain due to tension or migraine headaches, either by inhaling the vapors or by placing one drop of oil on the temples. Lavender used in the bath is also very helpful for stress and muscle and joint pain. Used at bedtime it can help you to fall asleep, and to get better quality sleep. Studies have shown that poor sleep increases pain levels, and improving the quality and amount of sleep you get will help reduces those levels. (In combination with chamomile, there is an increased benefit for sleep, stress reduction and pain relief.) Try this lavender and chamomile bath soak to help relieve stress, relax you and reduce pain. Or grab a bottle of pure lavender oil and add a few drops to your bath. Top 8 Uses For Lavender Oil 
 

 ChamomileChamomile is a highly effective anti-inflammatory. It’s used for headaches, muscular and low-back pain, neuralgia, and TMJ; as well as PMS and stress that causes digestive problems. It is especially effective blended with lavender, although it works well in blends with many other oils as well. This is my favorite brand of chamomile oil for pain relief purposes.

 Clary SageClary sage is especially useful in massage oils for relieving muscle spasms, muscle aches and cramping; but should be used in very small amounts. Clary sage should never be used with alcohol or before a night when you plan to have cocktails or a glass of wine, since it increases the effect of all alcoholic beverages and can be dangerous. Used with chamomile, it is very effective for PMS and menstrual difficulties. Here’s a good bottle of clary sage essential oil. It’s only $3!  

JuniperJuniper essential oil has many uses, but the ones most relevant to pain relief are its antispasmodic and antirheumatic properties. Applied in a cream or lotion (such as this one), juniper will help reduce muscle spasms, as well as the muscle and joint aches and pains associated with arthritis, fibromyalgia, and similar illnesses. Juniper also strengthens the nerves, and may also be helpful in neuropathic pain with regular use. Because juniper also has stimulant properties, it should be used early in the day, and not near bedtime as it could interfere with the ability to fall asleep. This is my favorite brand of juniper essential oil.

 EucalyptusEucalyptus oil has similar properties to juniper, being analgesic and anti-inflammatory when used topically. It can be used as a cream or lotion massaged into painful areas, or in the bath as a bath salt or oil. It is recommended for the treatment of muscular aches and pains, strains and/or sprains, and nerve pain. It also works well in combination with other essential oils such as lavender, but should be used with care since large amounts can be toxic. This concoction of eucalyptus, chamomile and rosehip oil from Village Natural Therapy has been proven to effectively relieve pain. Read More: Top 8 Uses For Eucalyptus Oil

 RosemaryRosemary oil is helpful for headaches as well as for muscle and joint pain. It is also used to enhance mental alertness, concentration, and memory; and has an antidepressant effect as well. It blends well with lavender, chamomile, peppermint, and clary sage; but should not be used by pregnant or breast-feeding women. Read More: Top 7 Uses For Rosemary Oil

 PeppermintPeppermint oil is especially useful for headaches, including migraine. This is rather odd, since eating peppermint is a known migraine trigger for many, and can intensify the pain of a migraine that you already have. For headache, 4 drops of peppermint oil can be blended with one tablespoon of a carrier oil like olive or jojoba oil. Apply a small amount of this blend to the temples, staying well away from the eyes, and massage in gently. (Adding a few drops of lavender and/or one or two drops of rosemary oil can enhance the effect.)

DIY Kimchi-I love Kimchi!


This recipe is linked to the GFE Gluten Free Virtual Support Group, EOA Link Up, Allergy Free Wednesdays, the Gluten Free Homemaker, Slightly Indulgent Tuesday, Frugal Days Sustainable Ways, Simple Lives Thursday, and Fat Tuesday.
Megan’s Kimchi Recipe:
Note: There are several types of ground red pepper, but make sure you use Korean red pepper in this recipe. You can buy Korean red pepper from your local Asian market. 


2 heads of Napa cabbage (medium sized cabbages are best)
2 tablespoons sea salt
6 – 8 tablespoons Korean red pepper
1 3/4 tablespoons fish sauce (omit if vegan)
4 teaspoons runny honey (or coconut nectar for vegan)
1 tablespoon ginger, fresh grated
2 -3 garlic cloves, pressed
1 to 1 1/2 bunches of scallions, cut into 2 inch pieces
3 to 4 carrots, peeled and shredded
  1. Remove outer leaves from the cabbages.
  2. Cut each cabbage in half lengthwise, trim the ends, and then roughly chop it into 2 to 3 inch pieces.
  3. In a large mixing bowl, layer the chopped cabbage with the sea salt. Allow the cabbage to sit with the sea salt for about an hour; stirring occasionally (This is a good time to get your hands dirty. Stir the cabbage using your hands and don’t be afraid to squeeze it. This will help the salt draw out the moisture from the cabbage, which is a very good thing. Do not discard this liquid).
  4. Sprinkle in the Korean red pepper, fish sauce, honey, ginger, and garlic. Mix well.
  5. Stir in the scallions and carrots.
  6. Divide the kimchi into two 4-quart glass jars. Using the back of a spoon, pack the kimchi into the jars, leaving about an inch of room at the top of each jar. Make sure your kimchi has just enough liquid to be submerged. (I generally have a 1/4 to a 1/2 cup of liquid left over after I pack my jars that I end up discarding. This is an incredibly messy process for me. I make a complete mess of the jars when I’m packing my kimchi, and if you do the same, it’s okay as long as you rinse the outside of the jars and wipe the inside and outside of the rim. When fermenting vegetables, you want your jar to be as clean as possible, otherwise it may mold.)
  7. Place the lids loosely on the jars and put the jars in a shallow baking dish (in case they overflow while fermenting). Place in a cool dark area and allow the kimchi to ferment for 2 to 5 days before storing in the refrigerator. (I found it helpful to take the back of a spoon and push down on the kimchi a few times during the day while it was fermenting. It prevented my kimchi from overflowing releasef the air that built up in the jar.)
This is my cabbage after I layered it with the sea salt in my mixing bowl:
The salt eventually broke down the cabbage and drew out the moisture. Now you are ready to add the rest of your ingredients and pack the kimchi into glass jars!

Rose Body Butter-Easy Recipe!


Coconut Rose Body Butter

60 grams refined Coconut oil
10 grams Jojoba oil
1 ml Alkanet infused oil
3 grams cornstarch
10 drops Rose essential oil

 Place the coconut oil, Jojoba oil, Alkanet infused oil and cornstarch in a glass bowl.  Heat mixture over a pan of simmering water until coconut oil is melted. Whisk to mix all ingredients.  Allow to cool to room temp.


Once mixture is cooled to room temp, add in your essential oil and whisk until fluffy and the mixture resembles frosting. 

Pipe or spoon it into a small jar.  Keep below 70 degrees for best results.  Use within 3 months.
http://www.freshpickedbeauty.com/2012/05/coconut-rose-body-butter.html

Yummy Organic Wine


Photo of grapes on the vine
Organic wine is becoming a popular choice amongst health conscious individuals

Organic wine – flavourful, healthful, ethical

By Pat Thomas
This holiday season organic wine could be the best treat you can give yourself – and the environment.
As more and more people become interested in ways of living more natural and healthier lives, attention to all parts of our diets becomes more focused. It’s easy to see the value, both nutritionally and environmentally, of fresh local natural organic produce in our everyday diets.
But what about those little treats we all enjoy, such as a glass of wine with family and friends?

Better for the land
Organic wines come from the same grapes as ‘normal’ wines but the difference is that they are produced without the use of synthetic herbicides, fungicides and fertilisers.
Pest control is achieved by encouraging biodiversity. Flowering plants like clovers, vetch and mustards are sown between the rows to attract beneficial insects like hoverflies and ladybirds which naturally control pests like aphids and leafhoppers.
There are lots of other sound environmental reasons why organic wine is the ethical environmental choice. For instance:
  • Studies show that wildlife significantly increases around organic vineyards, thus preserving and encouraging local biodiversity.
  • Organic wine is more climate friendly. Because it uses fewer chemical such as nitrogen fertilisers, its carbon footprint it lower.
  • Fewer chemicals means that organic wine production is also less polluting to soil and water.
More character
There are also aesthetic reasons why organic is gaining in popularity. Organic production is by necessity more labour intensive and ‘hands on’. When you buy organic you are buying something that is, in many ways, ‘hand crafted’.
French organic producers also believe that organic wine has a more authentic ‘terroir’ or regional character. Terroir is the result of a mixture of microclimate, altitude, geology, soil chemistry and unique yeasts which all combine to make a wine a unique product of wherever it is made.
Conventional wines, it is argued, have largely lost their sense of terroir, because it is all but destroyed by conventional industrial winemaking practices.


Good news or you too
But it’s not just the land that benefits from organic wine production. We do too.
Organic wine contains around half the sulphites of conventional wine – good news if you are sensitive to these food additive. Sulphur dioxide can cause allergic reactions particularly in asthmatics and some believe it makes for worse hangovers.
In general organic crops contained significantly more nutrients such as  vitamin C, iron, magnesium, and phosphorus and significantly less nitrates than conventional crops.
When it comes to wine, there is evidence that organic grapes also have more antioxidants and higher levels of resveratrol.
Resveratrol is a compound found in red grapes that has been shown to be beneficial to health by lowering cholesterol and preventing cell oxidation, an important process in the prevention of cancer, heart disease and other diseases of modern life.
Resveratrol occurs in grapes as a defence against low to moderate levels of  pathogen and insect attack. Spraying with pesticides halts this defence mechanism.
Hardly surprising then that in one study researchers found that grapes sprayed with fungicides commonly used on conventional vineyards had 80% less resveratrol.

Label confusion
Although both Europe and the US have standards for organic wine, there is endless confusion about what organic wine is and often the labels on the bottle offer very little in the way of clarity.
It could even be argued that, technically speaking, there is no such thing as organic wine since it is the grapes not the wine that are certified organic.
In Europe things were on the verge of changing when, in June 2010, the European Commission formally withdrew its proposal for organic wine standards.
This was due to member states failing to agree what these standards should be and in particular what limits should be set for sulphite levels.
Had the new regulations gone ahead wine would have, for the first time, been permitted to be labelled as ‘organic’.
Although there is a lack of specific EC regulation for wine, the grape production, processing, bottling and labelling will continue to be subject to the certification and inspection system by official bodies such as the Soil Association (UK), Ecocert (France) and AIAB (Italy). These requirements apply to anyone wanting to make any organic claims about their wine.
This means that if you are producing organic grapes you must have them processed and bottled by a certified organic winery to make any claim about the organic status of the grapes, such as ‘wine made from organic grapes’ or ‘made from organi­cally grown grapes’.

US standards
In America there are four categories of ‘organic wine’: 100% Organic, Organic, Made With Organic Ingredients and Some Organic Ingredients. Understanding the differences among the four categories is important if you want to know what you are really buying.
  • 100% Organic carries the United States Department of Agriculture (USDA) organic seal and indicates the wine is made from 100% organically grown ingredients and has been monitored throughout its entire production process. This wine can contain only naturally occurring sulphites (or sulphur dioxide, an antimicrobial substance) in less than 100 parts per million (ppm).
  • Organic also carries the USDA organic seal and indicates the wine has 95% organically grown ingredients (the other 5% must not be available organically). Again the certifying agency must be listed and the wine has the same sulphite requirements as 100% organic.
  • Made with Organic Grapes or Some Organic Ingredients means the wine contains at least 70% organic ingredients. It can have artificial sulphites added, but it may not contain more than 100 ppm. This does not have the USDA organic seal.
The spirit of organic
Around the world, some wine producers will follow the letter, but not necessarily the spirit, of organic production.
Others have adopted a wholly organic philosophy in the production of their wines, using only natural treatments in the vineyard in accordance with recognised organic practices. In addition to being organic some of these producers are also biodynamic.
Biodynamic is a concept originated by the early 20th-century Austrian philosopher Rudolf Steiner and in many ways is the ultimate organic. Inasmuch as it emphasises the holistic development and interrelationships of the soil, plants and animals as a self-sustaining system.
For instance, biodynamic wine growers may make their own compost and/or watch the stars and planets to time what they do.
Biodynamic growers also favour homemade ‘teas’ as epst control. These are made from soaking medicinal plants in freshly boiled rainwater to keep their vines healthy.
For example chamomile tea is used to prevent heat stress and valerian tea is used after frosts as a “winter warmer”.
Teas made from oak bark prevents mildews and grape rot from spreading whilst comfrey and nettle are used as a liquid feed to keep the vines stress free.
In the actual wine making process instead of adding yeasts (which is allowed under organic standards) biodynamic producers let the yeasts naturally present on the grapes do the fermentation.
Taste tests suggest that the process works.

In 2010 Fortune magazine conducted a blind tasting comparing 10 biodynamic wines with 10 conventionally produced equivalents. The wines were judged by seven wine experts including a Master of Wine and head sommeliers, nine of the biodynamic wines were judged superior to their conventional counterparts.

The biodynamic wines “were found to have better expressions of terroir, the way in which a wine can represent its specific place of origin in its aroma, flavor, and texture.”
Throughout the world the kind of organic wine you can buy will vary enormously. What is more, biodynamic agriculture does not have a legal status distinct from organic so you may have to become a label-reader to find the type that you prefer.
But the effort can turn a simple pleasure into an expression of planet-loving activism. Chee

Cast Iron Pizza by the Domestic Man

Cast Iron Skillet Grain and Gluten Free Pizza

http://thedomesticman.com/2012/12/13/cast-iron-skillet-grain-and-gluten-free-pizza/ 


Like most residents of planet Earth, I’m pizza crazy. I’d like to say that my love affair started with those pesky Ninja Turtles, but I have a feeling that I was addicted well before the heroes in a half shell became popular. When adopting Paleo, I was probably worried about a lack of pizza the most, and after re-introducing dairy I tried all sorts of things, from frozen GF crusts to eggplant pizzas. Finally, I hunkered down and developed a gluten and grain free pizza crust of my own, and after several failed attempts, I’m happy to say that you will love this pizza.
Do I really need to provide a food history for pizza? Okay, since you asked so nicely. Pizza is a food first traced to Ancient Greece, when they took bread and covered it with oil and cheese (this is also the base for Pita bread). Italy is credited for adding tomatoes to pizza following their introduction from the New World in the 15th and 16th centuries. Interestingly, the combination of tomatoes and cheese wasn’t popular for hundreds of years, until the famous Pizza Margherita (tomatoes, cheese, and basil) incident – wherein the combination was served to Queen Margherita in 1889 to represent the Italian flag.
Pizzerias existed in the United States at the turn of the century, but it was only popular with Italian immigrants. Soldiers returning from the European campaign of World War II raved about pizza, and it became the sensation it is now almost overnight.
Don’t forget that I am giving away a SIGNED copy of the new Perfect Health Diet book this week!

You’ll Need: (makes two pizzas)
for the crust -
1 1/2 cups tapioca starch
1/4 cup each heavy cream and water (or 1/2 cup milk instead of cream & water)
1/2 tsp salt
1 egg, beaten
1/4 tsp dried oregano
pinch of white pepper
3/4 cup parmesan cheese (or any hard cheese), grated

for the toppings -
1/2 cup pizza sauce
3/4 cup mozzarella or other soft cheese
toppings

In a saucepan, combine the cream, water, butter, and salt and bring to a simmer on med/low heat. You want to get it to the point that it’s starting to bubble, but not boiling. In a large bowl, add the tapioca starch. When the cream/water mixture is heated, add it to the starch and stir it all together. It will start to clump together, which is fine. Let the mixture cool for five minutes. As it cools, preheat your oven to 500 degrees.
Add the beaten egg to the mixture, and knead together with your hands. Add the cheese, white pepper, and oregano, and mix together until it’s dough-like. This is enough dough for two pizzas.

Split the dough in half, then stretch it out into the thinnest frisbee possible. It will likely tear if you stretch it too far, so just pull it as far as you can. Put the dough in a cast iron skillet, spreading to the edges of the skillet with your fingers. Try to get it as thin as possible. With a fork, poke some holes through the dough to let air pass through.

Bake in the middle of your oven for six minutes, then take it out and put it on your stove (keep the oven on!). The dough may bubble up a little while cooking, which is fine – it’ll go back down once you take it out of the oven. It’s hard to tell in this picture, but the dough will have taken on a more bread-like consistency at this point. This step is important because it gives the dough time to cook through without burning the toppings.

Add the 1/4 cup of sauce. Might I suggest a blended version of my homemade Superior Spaghetti Sauce?

Add the toppings, whatever you’d like. You can go with a standard topping fare like in the picture above, or try something more unique like a cheese-less pizza (often referred to as Pizza Marinara) or another favorite – Pizza Bianca, which is basically just dough, olive oil, salt, and rosemary, a popular style of pizza in Rome.

Throw it back in the oven and cook for another 8-10 minutes, until the cheese starts to brown. For extra crispy toppings, broil it for the last minute or two of cooking.

Fitness Flash Workout

workout

12 Amazing Natural Beauty Remedies

Natural Remedies For Anti-Aging


Are you a woman who suffers from wrinkles, dehydrated skin, and age spots? Have you ever wondered if there are natural products you can use to counteract these unwelcome aging effects? Studies have proven that avocado, lemon juice, and castor oil are some of the best choices in fighting these aging effects. How is this possible?
Avocado
In addition to being a great tasting food, avocado offers essential oils that provides a youthful glow to the skin.
When combating dehydrated skin, simply mash together the pulp of an avocado or place slices of avocado on your face while allowing the essential oils to penetrate the skin. By letting it sit for up to 15 minutes you will begin to notice a youthful and healthy glow that will last for days.
Lemon Juice
Lemons are no stranger to the beauty world. Many women use them when choosing to naturally bleach their hair. This same process can be applied when trying to counteract age spots.
After washing your face, squeeze the juice of 1 lemon into a bowl or small cup. Using a clean and sterilized eye dropper, place several drops of lemon juice on age spots and rub it in. After allowing it to sit for several minutes, rinse your face with warm water, let your face dry and apply moisturizer!
Castor Oil
Along with dehydrated skin comes the negative effects of wrinkles. This is where castor oil can prove to be a real help.
By applying a liberal amount of castor oil to your face and letting it sit for several minutes, the skin will begin to absorb the moisturizing oil and will begin to plump, thus allowing the wrinkles to be smoothed over and look less noticeable.
Do you suffer from age spots, wrinkles, or dehydrated skin? If so, Why invest thousands of dollars into products that claim to help, but contain ingredients you can’t even pronounce? Why not try natural remedies? To look and feel youthful, at a fraction of the cost, why not try Avocado, castor oil, and lemon juice to stop the effects of aging?

DIY Spa Treatments

At home spa treatments

Calabacitas

Calabacitas

Calabacitas


provided by dots
Prep Time: Serves: 6
Cook Time: Level: Easy
Description:

Enjoy this traditional Southwestern dish of sautéed summer squash, onions and peppers as a side or as a vegetarian filling for tacos.

Ingredients:


  • 1 tablespoon extra-virgin olive oil
  • 1 medium onion, chopped
  • 1 poblano or Anaheim chile pepper, seeded and diced
  • 2 cups diced zucchini
  • 2 cups diced summer squash or any squash
  • 1/2 teaspoon salt
  • 2 tablespoons chopped fresh cilantro, (optional) 
  • 1 teaspoon cumin


Preparation:

 dotted line divided

1
Heat oil in a large nonstick skillet over medium heat. Add onion and chile; cook, stirring, until soft
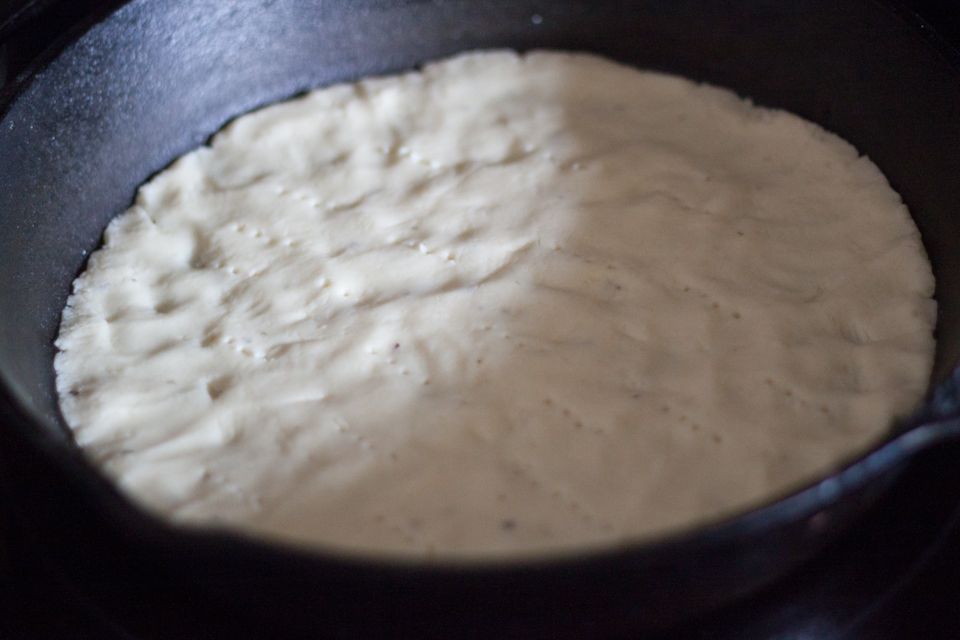
, about 4 minutes. Add zucchini, summer squash,cumin and salt; cover and cook, stirring once or twice, until tender, about 3 minutes. Remove from the heat and stir in cilantro (if using).
dotted line divided

Amla:The Benefits and How To Use

Amla: History, How to Use & Benefits


-
amla
Ayurvedic herb Indian Gooseberry, which is native to India and most commonly known as Amla, is a wonder fruit that is the size of a Lemon offering 20 times more vitamin C than Orange.
Despite being sour in taste, Amla provides numerous health benefits through its various forms including raw, juice and powder.

Benefits:

  • Amla is known to be beneficial for health owing to its properties of boosting the immune system.  It offers anti-inflammatory, antiviral, antibacterial, antimicrobial, refrigerant, astringent, hemostatic, aphrodisiac, diuretic, and laxative properties.
  • It is known to reduce heartburn, cure indigestion, hyperacidity, while stimulating appetite.
  • Amla is known to strengthen the teeth and gums, while offering relief from bad breath.
  • It claims to fight against cancer and other harmful diseases, along with controlling diabetes, cholesterol levels and increasing hemoglobin.
  • Indian Gooseberry is known relieve the symptoms of rheumatoid arthritis and osteoporosis along with helping in the treatment of minor hemorrhages.
  • It is said to play a major role in losing weight, curing diarrhea, dysentery, constipation, and piles and also eliminating intestinal worms.

For the Skin:

  • Amla is claimed to be one of the best exfoliating, antioxidant and antibacterial astringent scrub for the skin.
  • It helps in clearing the tan while tightening and toning the skin.
  • It also helps in balancing the skin redness along with removing the dead skin cells.

For the Hair:

  • Amla is said to show down the hair loss and graying, while increasing the thickness.
  • When used in a hair pack, Amla leaves the hair soft, silky and shiny.
  • It works to improve the nature and follicles of the hair while promoting hair growth.
  • Strengthens the hair from the roots and promotes hair pigmentation.

How to Use:

Amla, Yogurt and Honey Facial Treatment- Suitable to all skin types

Mix two teaspoons of amla powder in some hot water and stir it up for a smooth consistency. The add one teaspoon of honey (mauka would do wonders) and blend it in the warm mixture. Then add a teaspoon of unflavored yogurt and mix it thoroughly.
Apply on the skin for 15-20 minutes and wash it with water to achieve a soft and clean skin.

Amla Pack for Hair

Mix 4 teaspoons of amla powder 4 teaspoons of conditioner with some olive oil in a deep bowl to make it into a stiff paste and set it aside for 15 minutes.
Fill this paste into a pastry like bag and squeeze it in the combed hair sections until the whole head is covered. Massage the scalp and cover the head.
After 15-20 minutes you can wash it off with a regular shampoo and clean running water. If you require deep conditioning, you could leave the pack for up to an hour and then rinse.
Amla also is known to improve muscle tone, condition urinary system, balance stomach acids and decrease the levels of free radicals. It also helps strengthen the liver and immune system, while providing body required proteins, minerals, calcium, fiber and carbohydrates.
Source: Livestrong

Interval Workout

beat boredom interval workout

Brussel Sprout Salad

Brussel Sprout, Goat’s Cheese & Pistachio Salad

Cooking Steps

Trim the brussel sprouts and pare off any loose leaves. Shred very finely, either using knife (carefully) or a mandolin.
Whisk the mustard, oil and apple cider vinegar.
Toss the shredded sprouts, goat’s cheese and pistachios in the mustard dressing. Chill until needed.
Ingredients
  • 8oz brussel sprouts
  • 2oz goat's cheese, chopped (optional, omit for non-dairy option)
  • 1/2 cup roasted & salted pistachios, shelled
  • 1/2 tbsp yellow mustard
  • 1/2 tbsp extra virgin olive oil
  • 1/4 tsp apple cider vinegar

6 Day Mini Cleanse


A Mini-Cleanse For The Next 6 Days

You know what to eat. We all know what to eat. But sometimes, we get a little distracted, a little bored, a little emotional, a little rebellious... and a little food-fatigued. Sometimes, we just want someone to tell us what to eat.

Lucky for you, I love to share. This three-day menu is from a 6-week cleanse program I run three times per year. 

It's food-based and jam-packed with phytonutrients, amino acids, Omega 3's and other nutrients that just make you feel good! If that's not enough to motivate you, two thirds of the group consistently loses 8 pounds in the first week. (And they keep it off!)

Follow the plan for three days, then repeat.


Day One

AM: Hot lemon water with cayenne pepper

Breakfast: Green smoothie made with regular lean or vegan protein powder, unsweetened almond milk, frozen berries, greens, bee pollen, cinnamon and ice

Lunch: Half an avocado with tomatoes, chives, shrimp/white beans drizzled in lime juice(if paleo do without beans)

Snack: Apple

Dinner: Red cabbage and carrot salad with sunflower seeds, cilantro and mint drizzled in olive oil and lime juice served with wild salmon

Snack: Warmed vanilla almond milk with a cinnamon stick and a pinch of vanilla bean

Day Two

AM: Hot lemon water with cayenne pepper

Breakfast: Green smoothie made with vegan or lean protein powder, unsweetened coconut milk, frozen pineapple, greens, bee pollen, cinnamon and ice

Lunch: Wild salmon wrapped in nori sheetsor lettuce with avocado, sprouts, mache, tomatoes and grated carrots

Snack: Brazil nuts with goji berries(or almonds)

Dinner: Broccoli and squash salad over arugula with raw red cabbage and halibut(any white fish) topped with basil pesto

Snack: 1 banana whipped with nutmeg to make a fruit 'ice-cream'

Day Three

AM: Hot lemon water with cayenne pepper

Breakfast: Green smoothie made with unsweetened almond milk, coconut water, avocado, greens, coconut crystals (or 1 T coconut oil) and ice

Lunch: Citrus, radicchio and beet salad with hazelnuts and organic chicken/black lentils(skip the lentils if paleo)

Snack: Pear

Dinner: Roasted Brussels sprouts with almonds and pomegranate seeds( or a berry) served with mahi-mahi(any firm fish)

Snack: Fresh ginger tea with honey and pistachios

Holiday Detox Soup

Holiday Detox Soup

http://sooopaleo.blogspot.com/2012/11/holiday-detox-soup.html
Ingredients:
- 1 sweet onion, chopped
- 6 green onions (scallions), chopped
- 1 leek, chopped
- 1-2 Tbsp. garlic, chopped
- 2 green peppers, chopped
- 5 medium carrots, chopped
- 1 head of celery, chopped (about 6 stalks)
- 10 oz. of mushrooms, chopped
- 1 small head of cabbage, chopped
- Two 14.5 oz cans of organic diced tomatoes (no junk added)
- 1-2 Tbsp. olive oil
- Black pepper (and any other herbs/spices you want)
- 8 cups organic, low sodium chicken or vegetable broth (or homemade stock if you have)

Instructions:
1. Make sure everything is chopped and prepped! Chopping this many veggies can take longer than you may expect, so it is much easier to make this soup if everything is ready to go.
2. Heat the olive oil in your biggest soup pot over medium heat.
3. Add onion, scallions, leek, and garlic. Cook for 5-10 minutes until soft
4. Add peppers, carrots, celery, mushrooms, and cabbage. Cook another 10 minutes, stirring often.
5. Add the broth, your cans of diced tomatoes, and the black pepper and any other spices or herbs.
6. Bring the soup to a boil and then cover the pot, turn the heat to low, and simmer for 2 hours.
7. Forget about weight loss, and just enjoy the soup!

Note: This makes a LOT of soup. Be prepared.
Another Note: I have made this soup alot and enjoyed it.This is great to do with a cleanse also.


Tangerine/Mint Metabolsim Booster Tea


tumblrgym:  Dr. Oz’s Tangerine Weight-Orade Recipe… For a powerful metabolism-boosting drink, try Dr. Oz’s Tangerine Weight-Orade. It contains: green tea, shown to boost metabolism 12% by drinking just one cup; tangerine, with a chemical composition that increases sensitivity to insulin and stimulates genes that help to burn fat; and mint, a calorie-free flavor enhancer. In a large pitcher, combine: 8 cups of brewed green tea / 1 tangerine, sliced / A handful of mint leaves / Stir this delicious concoction up at night so all the flavors fuse together. Drink 1 pitcher daily for maximum metabolism-boosting results. Get more fitness motivation here 
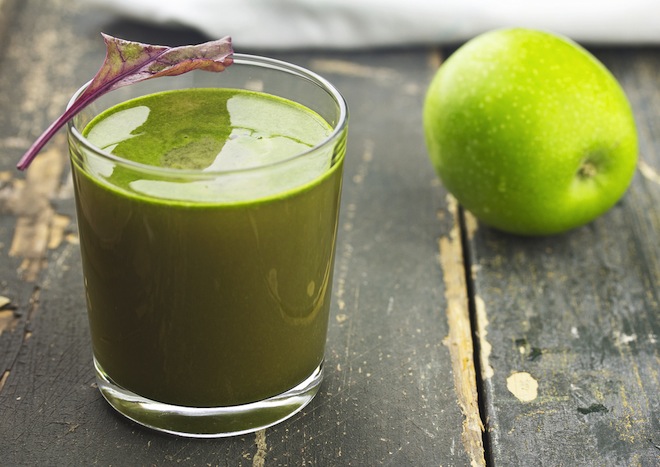
In a large pitcher brew 6 cups of green tea,add one tangerine sliced and a handful of mint leaves.Mix this up at night.Drink the next day for maximum metabolism enhancing benefits.Enjoy!~Tiffany

Make Soup a Meal


Fresh vegetable soup

How to make soup a meal

http://www.fitalicious.com/2012/12/how-to-make-soup-a-meal/
With soups appearing more on our tables in cooler weather, why not have them serve double duty as the full meal? Soups can be quicker to prepare than other main courses; one pot makes cooking and clean-up a snap. They’re warming, filling, lower in calories than many other options and invariably nutrient-rich (all those vitamins and minerals are retained—and then consumed—as they simmer right into the broth).

Here’s how to make a hearty soup that really satisfies, ensuring you won’t be grazing through the refrigerator an hour after dinner. 

Use a substantial base. It’s fine to use water as your soup base depending on the recipe, of course—but adding an extra dimension with broth or non-dairy milk will render the soup more filling and will intensify the existing flavors.
Include protein-rich ingredients. For the soup to satisfy, you’ll need a full serving of protein right there in the bowl.  Adding beans or legumes (chickpeas and lentils are particularly protein rich) or pureed nuts or seeds (cashews or hemp seeds work beautifully and add creaminess, too) is a great way to up the protein quotient.
Don’t forget grains. Soups containing grains are more filling and more nutritious. Grains offer high fiber and have been shown to promote heart health as well. It’s worth saving one of your grain servings for your bowl of broth or stock.
Love those veggies!  Soup is the perfect vehicle for vegetables, keeping all their fiber and nutrients intact—and a great way to include those uber-healthy varieties you might not appreciate in other dishes.
Include your bread right in the bowl. Rather than slather a slice of bread with butter or margarine on the side, add it right into the soup itself, or use pasta instead of grains. Dumplings, croutons or big hunks of sourdough can enhance the appeal of an otherwise “plain” soup.
Forget fat-free. If your meal-in-a-bowl will sustain you, this is no time to fear fat. For balanced nutrition, we need all three macronutrients: carbs (e.g., veggies and whole grains), protein and fat.  Healthy fats increase creaminess, enhance the mouth feel, and intensify the flavor of any soup.  Use it to sauté onions, mixed with a pesto garnish, or via nuts blended into the base for silky, creamy soups.
There’s nothing like a steaming bowl to help you face the winter weather—especially when it’s got all the nourishment you need

DIY EYE DROPS

  Eye Drops.


5 parts distilled water
2 parts honey
1 part apple cider vinegar
No need to refrigerate.  This is a special formula found in Stanley Burrough's book, Healing for the Age of Enlightenment.


These drops have been used for Glaucoma, cataracts, spots, film and growths of various kinds.  Apply drops one at a time to each eye several times a day until condition has cleared. 

1000 Rep Workout

1000 Rep Workout

DIY Cheek Blush-Very Easy

Pineapple Romaine Juice Recipe

Pineapple Romaine Juice Recipe
This recipe makes enough for one good size glass, or two small glasses of juice.

Ingredients:
 
1 Head of Romaine Lettuce (also called Cos Lettuce)
1 Pineapple

Note:  If you don't have romaine lettuce, use another good quality green like spinach or arugula.
Image
Directions:
Wash the romaine lettuce and set aside.  Cut the top off of the pineapple and remove the thick rind and core (note: you can juice the rind and core, but I prefer not to).  Cut the pineapple into long slices for juicing. 
Juice the pineapple and lettuce, alternating the two to help push the delicate lettuce through your juicer.

You'll notice that the pineapple is a bright yellow and the lettuce is bright green which makes a really pretty mix at first....

Image
When you mix it all together the juice turns a bright green color that comes from the chlorophyll in the lettuce.
 
Here's the finished product....

Image
I love it!  It is really yummy.  Give it a try, you might be suprised how great it tastes.

Have a juicy day!

4 Ways To Boost Your Energy & Happiness


4 Ways Boost Your Energy & Happiness

With a to-do list that seems to go on for miles you may be left wondering how you’ll ever have the energy you need to get everything done.

Using some quick and highly effective techniques to boost your energy level can be a great way to feel better on a day-to-day basis and also improve your happiness quotient as well.

Those who have more energy on a regular basis are far more likely to be more social overall and those who have a strong social support system almost always experience greater joy and satisfaction from life.

This said, let’s look at a few fast ways that you can boost your energy levels.

1. Give thanks

The first way to up your happiness level is to give thanks. At least once a day, stop and think about three or four things in your life that you’re currently very thankful for.

This could apply to anything – your family, friends, relationship, career, hobbies – whatever you feel blessed with.

This will immediately put you in a better and happier frame of mind, changing your outlook for the day.

2. Start the day with some stretching

Second, another smart thing to do is to begin the day with some stretching. Stretching will awaken the body, increasing blood flow and circulation, while helping you feel that much healthier and stronger.

Plus, it can add a sense of calmness to the body, which enhances your mood and feelings of being in control over your life as well.

3. Focus on veggies at every meal

It’s normal to want to enjoy some indulgences over the holidays, however too many can lead to huge energy slumps, mood swings, bloating, weight gain, breakouts and in crease in your stress levels. Nothing you want to experience over the holidays, or anytime!

Focus on making as much of each meal or snack vegetables. This will fill you up with nutrient dense, anti inflammatory, calming foods that will sustain your energy, and leave less room for processed foods.

4. Schedule time for ‘flow’ activities

Last but not least, make sure that you take some time at least once a week to do any form of activity that you lose track of time while doing. They call this a state of ‘flow’ – where you are so immersed in what you’re doing that you forget about time and all that’s stressing you for a brief moment.
These types of activities bring great joy to our lives and help combat stress in a hurry, so they are important to get in every so often.

So there you have some top tips to remember if you want to enhance your energy level and create better happiness in your life.  Start using these and you’ll be noticing the positive impacts shortly.

 
Copyright © Healthy Natural - All Rights Reserved
Proudly powered by Blogger