Latest Article Get our latest posts by subscribing this site

DIY Natural Room Scents


  Keeping the supply list simple. I only used items available at the grocery store or in my yard for these scent recipes. I want this to be easy and inexpensive so that I can set up a sustainable routine of pleasantly scenting our home. These recipes are simply guidelines and don't have to be followed exactly. In fact, I change them up all the time based on what I have on hand in my kitchen or yard.

How to Make Natural Room Scents
Fragrant items for naturally scenting your home:
  • citrus -- I've tried other fruits. Some of them smell good initially, but they don't hold up for more than one use. Citrus is sturdier, longer-lasting, and gives these scent recipes freshness. Lemons and oranges are particularly fragrant and have the best staying power in these scented waters.
  • herbs -- Any herb can be used for making a room scent, but the ones that are sturdier and on woody twigs hold up the best. My favorites for room scents are rosemary and thyme.
  • pine or cedar twigs/needles -- There may be other fragrant trees that will work, too; pine and cedar are the two I've tried for their appealing, fresh fragrance.
  • extracts -- A touch of vanilla or almond extract improves most room fragrance mixtures. Mint extract has a nice fresh scent. 
  • spices -- You can use ground or whole sweet spices. The whole spices look prettier, if your scented water will be in a location where it will be seen. I have found that cinnamon sticks and whole cloves have the most scent staying power. Cinnamon sticks can be rinsed off and reused several times. They keep on giving.
view whole spices on Amazon:
cinnamon sticks,  anise stars,  allspice,  cloves
Scents_for_home2.jpg
Five Natural Room Scent Recipes
These are all scents that my nose likes. But, scents that are pleasing to one person may not be to someone else. Consider how many different scents of perfumes, soap, and candles there are in stores in an effort to appeal to the masses. So, use my recipe combos as guidelines that you can tweak and customize to suit what your nose likes.
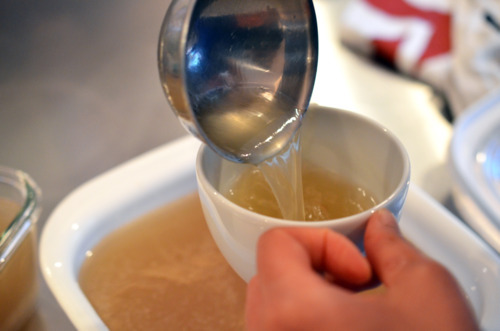
General procedure: Combine the ingredients in a 2 cup (pint) jar or container, or in a pan on the stove top. Cover them with water and heat. I'll explain different heating options further down. Keep reading.
view on Amazon:  ♦pint jars    ♦plastic lids for jars
Scent #1: Oranges, cinnamon & cloves (allspice and anise are optional). This is my favorite, both for it's wonderful aroma and for it's staying power. This scent carries into multiple rooms better, and it can be reheated to scent your rooms for several days.Scents_for_home4.jpg
Scent #2: Lemon, rosemary, & vanilla. A similar scented water is often simmering in Williams-Sonoma stores. It has a lovely freshness to it.  Scents_for_home5.jpg
Scent #3: Lime, thyme, mint & vanilla extract. This combination has such a fresh, pleasant scent. I initially made it without the mint extract, but have found that it really kicks up the aroma.Scents_for_home6.jpg
Scent #4: Orange, ginger (fresh or powdered), and almond extract. This is a sweet, delicious scent. Scents_for_home7.jpg
Scent # 5: Pine or cedar twigs (or other fragrant twigs), bay leaves, and nutmeg. These scents combine for a complex aroma. If you have whole nutmeg, use a microplane to grate off the outer surface--this will release the scent. Add the whole nutmeg piece along with the gratings.
view on Amazon:  Microplane
not_used5.jpg
Here's the gang of five. Aren't they beautiful? I like to make these up in pint jars and keep them on hand in the fridge so I'm ready to start a pot of simmering scents as needed. Uncooked jars will keep in the fridge for several days. IMG_3846.jpg
How to heat the scented mixtures
I've tried a variety of methods, and all of these work to varying degrees. Some of them provide a more powerful scent than others. Just like the air fresheners you buy, none of these will scent a whole house; but I'll show you some ways to set up individual scent sources in multiple rooms. Hopefully you already have what you need to try out one or more of these options.
Stove top method. This is by far the best way I've found to get the most powerful scent that will spread to more rooms the fastest. It's easy as can be. Simply combine the ingredients in a pot on the stove, bring them to a boil, and then lower the heat to a simmer. They will immediately begin to scent your kitchen and spread to other rooms. How far the scent spreads depends on the size and layout of your house. A simmering pot like this makes all four rooms on our first floor smell good. The only drawback of this method is that you have to keep a close eye on the water level. If the pan dries out, you'll be smelling burned citrus instead of sweet, fragrant citrus.  NOTE: For a stronger scent, simply double or triple the recipe in a larger pot on the stove.
IMG_3901.jpg
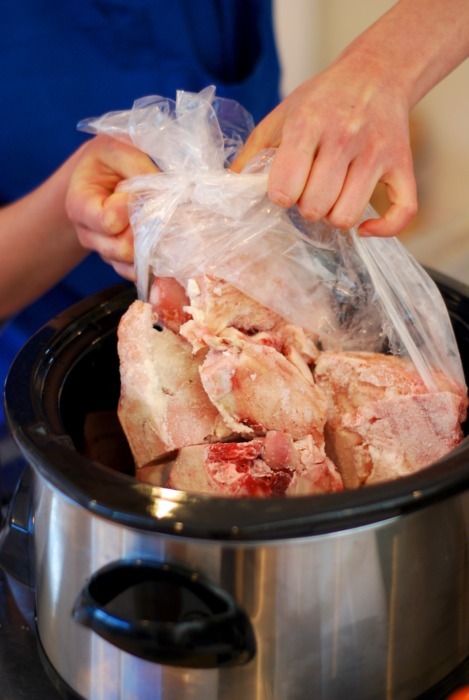
Uncovered Slow Cooker Method. This is my personal favorite for having my house smell pleasant every day. I use a mini slow cooker--the kind made for keeping dips and sauces warm. Mine only has one low heat setting. The mixture never actually bubbles and visibly steams. I leave it uncovered on my kitchen counter to slowly release scent throughout the day. It's subtle, but creates a pleasant smell in the house. When I'm home, I keep my mini slow cooker going. It's easy and uses very little electricity. When I fill mine in the morning, it won't dry out for an entire day. If you're concerned about accidentally letting it run dry, you can put a lamp timer on it so that it automatically shuts off at the desired time. I put a scented jar mixture in the microwave for 2 minutes to get it really hot before I add it to the slow cooker. That gives it a jump start on releasing the scent.  NOTE: For a stronger scent, simply double or triple the recipe in a larger, full-size slow cooker.
view on Amazon:   ♦mini slow cooker   ♦on-off lamp timer (for auto shut-off)
Scents_for_home9.jpg
Fondue Pot Method. If you have a fondue pot, then you have a portable scent station. Set it up in any room you'd like to scent. Below is a small ceramic fondue pot I have that uses a tea light for heat. So, this will only remain warm as long as the candle lasts--3-1/2 for 4 hours. Like the slow cooker, this is a low level of heat and releases a very subtle scent--enough for a small room. Get the scent mixture boiling hot before adding it to the fondue pot. I like to set this up in our entry way when we have guests. It makes it smell wonderful when you walk through our front door. And, it looks pretty.
view on Amazon:  small ceramic fondue pot
IMG_3882.jpg
Mug Warmer Method. I normally keep this little mug warmer next to my computer to keep my coffee and tea warm. I've discovered it also can be used to keep a jar or small bowl of scent mixture warm. It only keeps it warm, it doesn't actually heat it up. So again, be sure to heat the mixture before adding it the bowl. Or microwave a jar and set it right on top of the mug warmer. This low heat puts off a soft scent that is perfect in a bathroom.
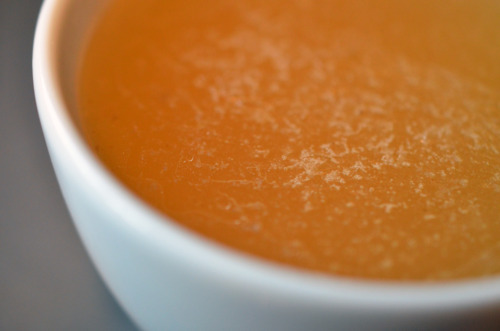
  • Here's a hint to keep it pretty. As the mixtures cook and lose their color, they're not as attractive. You can spruce it up by floating a fresh slice of citrus on top. Or add a few cranberries (I keep a bag of them in my freezer); they float and add a touch of color.
view on Amazon:  electric mug warmer
Scents_for_home11.jpg
Candle Warmer Method. These work just like the mug warmers. Candle warmers come with a little bowl on top for melting scented candle pellets. Instead, you can add some heated scented water. Or, remove the bowl and set a jar or other bowl on top.
  • Note: I tested the temperatures of these with a thermometer. The mug warmer and candle warmer both kept the mixture at about 120°F. That's enough to let off a very subtle scent, but don't expect these to strongly scent a big room. You need more heat and steam for a stronger scent.
Scents_for_home13.jpg
Tea Pot Warmer Method. My tea pot warmer also uses tea lights. I can put two or three tea lights in mine to achieve the temperature I want. These only last as long as the tea lights burn, but they can get hotter than the mug and candle warmers, thus releasing more scent. I can put a bowl or jar on top of my tea pot warmer, as long as I put it somewhere that I can keep an eye on it. I don't like to leave candles unattended.
view on Amazon:  cast iron teapot warmer
Scents_for_home12.jpg
Add more hot water as needed. As the water evaporates from any of these warming bowls or jars, top it off with additional HOT water. It needs to be hot when it's added so that it doesn't cool down the temperature of the scented water.  Higher heat = more fragrance.
Gift them! These make a fun, unique hostess gift. Take one along to a party as a gift for your host that can be simmered and enjoyed the next day.
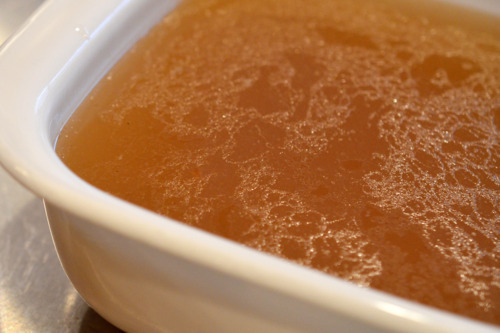
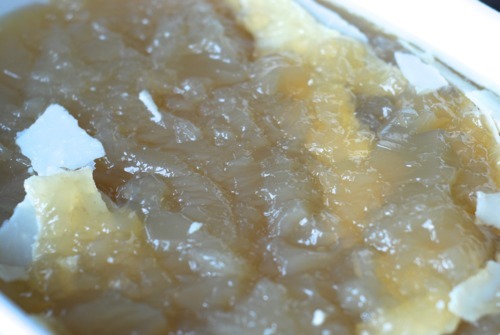
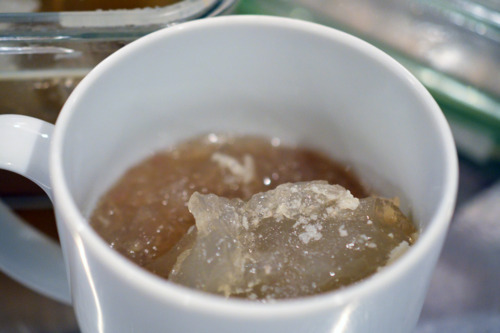
Reuse each mixture 2-3 times. After these have been heated and simmered for awhile, the water becomes cloudy (as you can see in the jars below), and some of the ingredients lose their vibrant color. Although they don't look as pretty, they still smell good. Usually, you can reheat and simmer these again 2-3 times. Jar them up and refrigerate them between uses. Open the jar and give it the sniff test--if it still smells good, reheat and reuse it. Add more water as needed.Scents_for_home10.jpg
Cost saving tips
You can save, use and reuse a number of fragrant ingredients. These scents don't need to be expensive.
  • Leftover ginger --  If you ever cook with fresh ginger and end up with leftover pieces , this is a way to use them up before they spoil. Slice the leftover ginger and freeze it in a bag or container to have on hand for whipping up a quick batch of scented water. 
  • Save your orange peels -- When you eat an orange, save the peel for use in scented waters. Store them in the refrigerator or freezer until you need them.
  • Save your juiced lemons and limes -- After you've juiced these for use in a recipe, refrigerate or freeze the leftover pieces.
  • Save your leftover herbs -- If you have herbs in a garden or have leftover herbs that you've purchased for cooking, they can be frozen and saved for use in these scented waters.
  • Use expired juices. If you have fruit juices that are past their prime, use them as a base in place of the water in these mixtures. They're both fragrant and colorful.
  • Use expired spices. Spices are supposed to be replaced after a year, because they lose much of their flavor. But, they still smell good! Instead of throwing out old spices, use them for scenting water.
squareIMG_3862.jpg
There are endless combinations for these scented waters. If you have some additional ideas, please share. I'm always looking for a new, pleasant scent for my home.
Oh, and good news . . . King-Man likes these natural scents. Happy husband, happy home.
Make it Yummy day!
Monica 

Link directly to this recipe Print this recipe
Natural Room Scents
By Monica
Ingredients
  • Citrus, sliced -- lemons, oranges, limes (may use peel only, if preferred)
  • Herbs -- rosemary, thyme, & bay leaves
  • Spices-- whole cinnamon, cloves, nutmeg, allspice (optional), anise (optional); may substitute ground/powdered spices
  • Ginger (fresh or powdered)
  • Extracts--vanilla, almond, mint
  • Pine twigs (or other fragrant twigs)
Directions
Use a pint (2 cup) jar, container, or pot to combine scent waters. Add ingredients to container, cover with water, and choose from these options:
--simmer on stove top, topping off with more water as it evaporates
--add heated mixture to a slow cooker, fondue pot, or something similar that will keep mixture heated. Preheat waters to a boil (in microwave or on stove top). As water evaporates, always top it off with HOT water to keep the temperature as high as possible. Higher heat = more fragrance.

FRAGRANT COMBINATIONS:

1. Orange, Cinnamon & Spice. 1 orange, 2 cinnamon sticks (or 2 teaspoons ground cinnamon), 1/2 tablespoon whole cloves (or 1/8 teaspoon ground cloves), 1/2 tablespoon whole allspice (or 1/4 teaspoon ground allspice), 1 anise star (optional)

2. Lemon, Rosemary & Vanilla. 3 sprigs of fresh rosemary, 2 lemons, 1 teaspoon vanilla extract.

3. Lime, Thyme, Mint & Vanilla. 3 limes, 3-4 sprigs fresh thyme, 1/2 teaspoon mint extract, 1 teaspoon vanilla.

4. Orange, Ginger, & Almond. 1 orange (or peel from 2 oranges), 1 4" finger of ginger, sliced (or 1 tsp ground ginger), 1/2 teaspoon almond extract.

5. Pine, Bay Leaves, & Nutmeg. Handful of pine twigs or needles, 4 bay leaves, 1 whole nutmeg, outer layer grated into mixture.

Scented waters may be refrigerated between uses. Reuse for 2-3 days, or as long as they still have a pleasant fragrance.

Make Your Shaver Last Longer and other great tips


Other great tips
Tired of throwing out expensive razors only after a few uses? Try this tip next time you shave:
Pour a little bit of baby oil on the blades before you shave
You can also shave with baby oil, rather than shaving cream, for a smoother (and closer) shave!

Making Your Inner Liner Last-Makeup

INNER LINER LONGEVITY


photos + post by amy nadine, graphic design by eunice chun
How oh how can we keep the inner waterliner from fading fast? It’s a tough one, because our eyes are meant to stay wet, so the pencil that we’ve traced along our inner rims is constantly rubbing against our wet eyes every time we blink. Sigh… but I can share this little trick that does seem to make it last a couple hours longer. I’m not saying it’s the healthiest thing to do, so no need to make that comment below! I’m just saying when I’ve sent a client down the red carpet, I’ve used this trick to make it last throughout a long awards show. So how about we do it on important nights, not every day?! Here’s how:
  1. Rim your waterline with a black kohl or kajal liner. This one is our favorite because it’s waterproof yet creamy. Blink your lids together to get the product on the upper waterline. For those of you who are very comfortable with lining your eyes, look down and lift your upper lid to rim the upper waterline as well.
  2. Dip a stiff angled eyeliner brush into a matte black eye shadow. Tap it a few times against a counter to get rid of the excess product, then “stamp” it along the waterline, directly on top of the original kohl liner. Really work it into the line that’s in between the waterline and the lash line, so no skin peeks through.

Pineapple Crock Pot Ribs

Paleo Pineapple Crock Pot Ribs 

Ingredients:

  • 1-2 pounds of pork ribs. Go with 1 pound if you have a smaller crock pot or slow cooker
  • 1 medium fresh pineapple
  • 1 tsp paprika
  • 2 tbsp sugar-free dijon mustard

Directions:

  1. Slice ribs apart and set aside.
  2. Cut off the top of your pineapple
  3. Cut the entire pineapple in half lengthwise
  4. Use a paring knife to slice as close to the rhine as you can to slice out as much pineapple as you can.
  5. Save the remaining two “boat” halves.
  6. Cut the pineapple pieces into 1″ cubes.
  7. Mix the dijon mustard with the paprika and rub all over the ribs.
  8. Place the ribs into the crock pot first, and then dump the pineapple cubes on top of them.
  9. Cook on low for 6-8 hours.

Serving

Use at least one of your carved out pineapple halves to plate the meal, especially if you have guests. Even if you’re cooking for one, it’s still pretty cool to eat out of a pineapple! Matt, I hope you enjoy this one as much as I do, and I know you’ll use the Pineapple as a bowl for sure!


Infograph of Drinking Water

More About the Foods for Glowing Skin


Foods for Glowing Vibrant Skin

  Charlie Pulsipher

Most of your skin’s health and its ability to react to stress, damage, and the environment rely more on lifestyle than on what you slather on your face. We treat each part of the body as distinct and separate, buying different products for hands, face, feet, and bodies or taking pills to work on one specific ill. This is how the medical, pharmaceutical, and beauty product worlds see us, as just specific parts that require attention.
Your face is not you alone, neither is your foot or your kidney. The heart is not the only part requiring attention when blood pressure starts climbing. The individual parts of the body are all interconnected, tied together with countless cells that are all relying on you to feed them well so they can be their best. It shouldn’t surprise you that the things you should do to improve heart health, control weight, and lower your risk for developing diseases are the same things you should do for better skin.
That’s right; you now know where this is headed. You need to exercise, get enough sleep, and eat healthier. If any aspect of your health is suffering, it means your body as a whole is suffering and these three simple things will help minimize or eliminate the cause.
Exercise does wonders for the entire body. It improves heart function; keeps veins young, elastic, and fit; and improves how cells burn energy. It increases circulation efficiency which keeps the cells furthest from the heart, like the skin, well nourished. Exercise also helps the body flush away toxins and oily residue that cause clogs, blemishes, and damage.
We’ve all heard of beauty sleep. This isn’t something made up by some coy actress in the 1950’s. Beauty and sleep are tied together. Sleep lets your body recover from the stress and mayhem of the day. It is a time to renew and conserve energy. The body produces growth hormones during sleep to facilitate the use of amino acids as they repair bone, muscle, and tissues, including the skin. During sleep, the skin’s metabolic activities actually rise as it fixes the damage that built up during the day.
Foods are the building blocks that our bodies use to grow, develop, and repair. Healthy, plant-based foods provide the energy and nutrients to do so well. If we aren’t eating good foods, we are starving our cells or just not giving them the proper tools they need to function properly. Here are a few of the best foods to keep you looking young and your skin at its finest.
Watermelon – Watermelon is a great source of hydration, hence the name, but also another good source of lycopene.
Almonds – Almonds are packed with vitamin E, an antioxidant that defends against sun damage. Nuts also help us maintain healthy weight. Those who eat several servings a week are less likely to gain extra pounds.
Chia Seeds – Chia seeds are rich in omega 3 essential fatty acids that erase blemishes, soften wrinkles, and help keep the skin hydrated and supple.
Tomatoes – Lycopene, the compound that gives tomatoes their rich color, is a powerful antioxidant that eliminates skin-aging free radicals from ultraviolet exposure.
Sweet Potatoes – These orange tubers are packed with carotenoids and vitamin C which boost collagen production. Collagen controls the strength, firmness, and flexibility of the skin.
Citrus – Citrus are another good source of vitamin C. Vitamin C also fights inflammation.
Peppers – Red bell peppers contain more vitamin C than an orange, along with other antioxidants. The spicier peppers come packed with capsaicin, a compound that improves circulation and promotes the release of toxins from the skin.
Spinach – Spinach is rich in folate, a B vitamin that aids in the repair of DNA and may reduce the risk of skin cancer. Greens like spinach, kale, turnip greens, dandelion leaves, broccoli, and asparagus all are rich in vitamin A, iron, and vitamin K. Iron aids circulation by carrying vital oxygen. Vitamin K may help prevent varicose veins.
Olive and Safflower Oils – The omega 6 fatty acids in these oils keep skin supple. Use them in moderation though.
Sunflower Seeds – These seeds are rich in selenium which preserves elastin to keep skin smooth and tight. Selenium acts as an antioxidant too. They also contain vitamin E which works well with selenium to enhance the effects of both.
Sesame Seeds – Sesame seeds contain zinc which can reduce the oily sebum that leads to clogged pores.
Carrots – These roots are filled with vitamin A. Vitamin A prevents the overproduction of skin cells which can lead to skin cancer and also contributes to clogged pores.
Dark Chocolate – The flavanols in chocolate act as antioxidants, provide sun protection, and reduce the roughness of skin for healthier appearance and feel.
Whole Grains – Whole grains are rich in B vitamins that assist cells in processing fats to hydrate and revitalize skin. The complex carbohydrates mixed with fiber in whole grains are digested and absorbed slowly and don’t create sugar spikes that contribute to acne. Refined and processed sugars do, and should be avoided.
Strawberries – These are another vitamin C rich fruit that may also lower the risks of skin cancer.
Apples – Apples contain quercetin, an antioxidant in the peel that protects against sun damage.
Avoid smoking and prolonged exposure to the sun. These both damage the skin and make it age faster. A few minutes of sun a day is healthy as it creates vitamin D, a powerful antioxidant and anti-carcinogen, but wear sunscreen if you will be in the sun longer than that. Avoid stimulants like refined sugar and caffeine. These upset balances in hormone levels and mess with circulation. They also make it difficult for the body to get the rest it needs to repair. Remember the simple three: exercise, sleep, and eat well for healthy skin.
Learn more about Charlie Pulsipher

Another ACV Toner for Your Face

Making Your Own ACV Toner

Step number one – acquire some apple cider vinegar. You want the good stuff. Trust me. Don’t skimp on whatever is cheapest at the store. You want raw, unfiltered apple cider vinegar that is still full of enzymes, minerals, nutrients, and beneficial strains of bacteria (called the ‘mother’). My favorite by far is Bragg’s, but I also like Eden Organics.
Step number two – add your ACV to a small glass container mixed with filtered water. Start with a 1:1 ratio (50% ACV, 50% water), but you might find you need to dilute the mixture more based on the sensitivity of your skin.
Apple Cider Vinegar Facial Toner
Step number three – take a cotton pad or the corner of a washcloth and dip it into the solution. Spread evenly all over your face after washing it.
Apple Cider Vinegar Facial Toner
Don’t rinse it off, but just let it air dry, then finish with a light layer of coconut oil as moisturizer.
This toner is incredible for balancing your skin tone, getting rid of acne and pimples, and giving you that ‘glow’ – naturally! And did I mention how cheap this is?!
Have you ever used a natural toner like this one? If not, what are you waiting for?
This post is linked to Simple Lives Thursday, Fight Back Friday, Your Green Resource

Easy Crockpot Chicken


The Best Whole Chicken in a Crock Pot

Ingredients

  • 2 teaspoons paprika
  • 1 teaspoon salt
  • 1 teaspoon onion powder
  • 1 teaspoon thyme
  • ½ teaspoon garlic powder
  • ¼ teaspoon cayenne (red) pepper
  • ¼ teaspoon black pepper
  • 1 onion
  • 1 large chicken

Directions

  1. Combine the dried spices in a small bowl.
  2. Loosely chop the onion and place it in the bottom of the slow cooker.
  3. Remove any giblets from the chicken and then rub the spice mixture all over. You can even put some of the spices inside the cavity and under the skin covering the breasts.
  4. Put prepared chicken on top of the onions in the slow cooker, cover it, and turn it on to high. There is no need to add any liquid.
  5. Cook for 4 – 5 hours (for a 3 or 4 pound chicken) or until the chicken is falling off the bone. Don’t forget to make your homemade stock with the leftover bones!
  6. Or even emulsify the juices and onions and you have a great gravy!

Slow Cooker Beef Bone Broth


Slow Cooker Beef Bone Broth


Here’s what I assembled to make about 4 quarts of beef bone broth:
  • 2 carrots, chopped medium
  • 2 celery stalks, chopped medium
  • 1 medium onion, chopped medium
  • 7 garlic cloves, smashed
  • 3.5 lb of beef bones (from Full of Life Farm)
  • 2 bay leaves
  • Kosher salt
  • 2 tablespoons of apple cider vinegar
  • water 
Here’s how I made it:
I dumped the vegetables in the bottom of a 6 quart slow cooker…

…dropped in the beef bones…

…tucked in the bay leaves, sprinkled on a wee bit of salt, drizzled the vinegar…

…and added enough water to cover everything.

I programmed the slow cooker to cook on low for 8-10 hours.

When it was done, I poured the broth through a strainer…

…discarded the solids, and stored the liquid in a large CorningWare container.

The bones I used were pretty fatty so it made the broth taste unappealingly greasy. I stuck the broth in the fridge overnight and scraped off the top layer of solidified fat.

The broth underneath looks like beef Jell-O…

The broth will keep in the fridge for a few days and in the freezer for several months.
When you’re ready for a steaming cup of the stuff, just scoop the meaty Jell-O into a microwave-safe mug and nuke for a minute.

Voila — perfection!


10 Ways To Slow Down Aging


10 Easy Ways to Slow the Aging Process

It is a well-worn cliche but age really is a state of mind.  If you follow these simple tips you'll feel soon younger than your years. And if you feel younger, your body is apt to be respond physiologically and before you know it you'll actually be healthier than others of your age. Of course we can't completely escape the aging process, but there are many easy and enjoyable things you can do to make you feel better and look younger - and most of them don't cost much! Many of the current articles about anti-aging will tell you to drink plenty of water and get lots of sleep and exercise etc, all of which are important, however,  I wanted to share some not so common tips about slowing the age clock.

1) An Inversion a Day

When was the last time you went upside down? Unless you are a gymnast, yogi, or grade school kid, it has probably been a while if ever since you’ve seen the world from this perspective. Yet therapists and fitness experts from ancient yoga masters to modern day physiologists rave about the benefits of practicing daily inversions. Here’s just a few reasons why: inverting, that is, raising part or all of the body upside down, strengthens and stimulates the circulatory system, boosts the immune system, nourishes the organs and glands above the heart and generally gives your vital organs a break by reversing the effects of gravity. According to these experts, five to fifteen minutes each day is all it takes to help mitigate the damage our upright lives have wrought upon us. And, considering the other more subtle benefits of inversion—lifting mood, building confidence, boosting immunity and rejuvenating energy—five to fifteen minutes seems like a worthy investment indeed. All you need to do is have your legs above your heart to get the benefits, even just lying on the floor with your legs up against the wall will work or if you're a seasoned yoga or Pilates instructor try doing a Roll-over or Plow.  

2) Stand Taller. 

Maintain good posture. Proper posture is a great anti-aging tool because when you stand up taller your body can take in more oxygen. All the cells in you body need oxygen to function correctly. Having good posture can also help your body remove harmful toxins and make you more energetic and alert, which can keep you looking young and refreshed. As people age they begin to slouch, as a result when you see someone hunched over you automatically begin to think they are older, heavier, and insecure. Stand taller and you appear thinner and have more confidence. Taking only a couple minutes a day, learning strong posture exercises will keep you feeling and appearing young, confident, and strong. Studies now show that a loss of height as we age might also indicate a shorter life span. Simply put, the taller we stand, the better we move and the better our heart, respiratory, and gastrointestinal systems function. You have to keep moving as you age to keep moving well as you age.

Proper posture can make you look 5 pounds slimmer, not to mention stave off back and neck pain.

3) Get your Vitamin D and Some Fresh Air.  

Docs Mehmet C. Oz, M.D., and Michael F. Roizen, M.D., call vitamin D "the ultimate anti-ager." That's because it nourishes your memory, skin, heart, bones, and arteries, and it helps fight off cancer. Getting enough vitamin D daily (1,000 mg; 1,200 mg after age 60) can make your body think it's 10 years younger.  Nothing rejuvenates like fresh air and sunshine — and with good reason. Sunlight encourages your body to produce serotonin, a brain chemical that's a natural mood booster. So revel in every opportunity you get to spend time outside (after putting on sunscreen and being careful to avoid sunlight between 11am and 2pm, of course). It doesn't have to be complicated: You can work in your garden, read a book in the park, or just take a stroll around the neighborhood. You'll find it's refreshing just to enjoy and be part of the world around you. 

4) Find a Sauna. 

Sitting in a sauna is another way to potentially reduce the appearance of wrinkles and give you a natural, healthy glow. Saunas help relax your muscles and help your skin eliminate toxins that may contribute to wrinkles. As the steam from the sauna penetrates your skin, it may also help plump up wrinkles and regular use can help keep you looking younger. Take a cold shower following you sauna treatment to help revitalize your skin. Drink plenty of water after your sauna session to help replenish the fluids lost from sweating.

5) C, Señorita.

Vitamin C is essential for your body to make collagen, the protein that keeps skin firm and elastic. Lisa Zdinak, MD, chief surgeon at Precision Aesthetics in New York City, recommends eating C-rich foods, such as strawberries and kiwis, to promote collagen production, in addition to applying a C serum such as Skincueticals C/E Serum, it makes you glow.

6) Keep Stress in Check and Meditate. 

Stress comes in many shapes, sizes, and strengths. Some stress is good if managed, but the bad kind ages you inside and out. Reducing bad stress with meditation or other meditation techniques can help you feel years younger. Researchers suspect that meditation slows down aging since aging is nothing but an accumulation of stress. Meditation and other forms of relaxation also change your perception on stress. This can lighten the physiological load. Meditation and introspection, also teach us to separate the events happening in your life from your reactions. By simply observing situations without judging them, you can control a stressful event. Some other studies show that meditation can help strengthen the immune system and also promote healing of illnesses that come up as age goes up.

To help relax after a long day, take a warm bath with a few essential oil drops, like lavender and add some Himalayan salt to rejuvenate, purify and soften your skin.

Being mindful — really tuning in to the present, not the past or the future — can help you focus on handling the tasks at hand. Spend some time every day noticing the things most people tend to ignore, such as breathing, bodily sensations, and emotions. 

7) Breathe.

If you are looking for ways that you can stay younger, you may want to add some deep breathing to your anti-aging program. You can deep breathe younger, but many people do not realize how important deep breathing is to your body keeping it as young as possible.

Oxygen is important to the body and the best way that you can get more oxygen into your cells is to do some deep breathing. When you breathe deeply it oxygenates your system, and also facilitates exhaling more carbon dioxide. Deep breathing helps to massage the stomach, liver, heart and other organs, keeping them healthy and young. The deep breaths helps stimulate your lymph system and improves blood flow. Increased blood flow and a healthy lymph helps eliminate more toxins from your body. Toxins are known to make you age more quickly, so deep breathing can help help you to stay looking and feeling younger longer.

Deep breathing is a great stress reliever. When you breathe deeply, you clear your lungs, increases mind focus, and the body relaxes and lets go of stress. Stress is a huge factor when it comes to aging so small steps can provide large benefits.

When you take a few deep breathes and hold for a count of six or seven, then exhale and you’ll see how this one exercise can make such a difference. When you oxygenate your cells, expand your lungs, eliminate toxins and stress, you’ll then notice how young and radiant your skin looks as a result.

8) Get Out of Your Comfort ZONE and Stay Inspired.

Looking for a quick way to feel footloose and fancy free? Try stepping out of your normal routine. Whether it's a mentally invigorating tour of historic homes or a relaxing stay on the beach, traveling somewhere new opens you up to fresh experiences and keeps your mind engaged. And it's not necessary to break the bank. Traveling on a budget is perfectly possible with senior discounts and economical options, such as group tours, which are perfect for those who dislike prevacation planning.

9) Keep Romance Alive.

Whether you've been together for 50 years or just 50 days, romance can be the spark that keeps you young. It's the ultimate — or most intimate form of social connection. Love, new or seasoned, can boost morale and emotional wellness — and may even affect longevity. To amp up the romance in your relationship, share a candlelit dinner, create a thoughtful, homemade gift, or dance the night away to your favorite song. You'll feel like young lovers all over again.

10) Get a Youthful Glow.

Attain glowing skin from the inside out by chowing down on foods like salmon, walnuts, chia and flaxseed, which are rich in omega-3 fatty acids. These foods help replenish your skin’s natural oils to keep it soft and supple and helps skin reflect light and looks more glowy, whereas dry, dehydrated skin looks dull because the flakes don’t reflect light as evenly.

A dry, flaky complexion could also be a deficiency in vitamin A, which helps drive cell turnover. Eating dark, leafy greens, like spinach and kale, and bright orange fruits and vegetables like carrots, cantaloupe, and sweet potatoes. “They’re good source of vitamin A, which helps revitalize the skin’s surface. Orange and red veggie, like carrots and tomatoes, contain carotenoids, pigmentation that increases yellow coloring in human skin and may produce a healthier-looking glow than a sun tan, according to a study published in the British journal Evolution and Human Behavior. Study participants who were asked to use a computer program to manipulate the levels of carotenoids and/or melanin in 51 Caucasian faces more strongly favored carotenoid pigments when tasked with adjusting color levels to create the healthiest-looking skin tone possible. 

Try to incorporate these simple techniques into your daily life, it may help add years and zest to your life. And remember to have fun doing it. In fact that's the 11th tip — don't take it all to seriously, have fun, lighten up and soon you'll be looking, feeling and moving years younger! 
~To Growing Younger,  Lo

ZWOW 29 CHALLENGE-BRUTAL BURPEES

ZWOW 29 CHALLENGE

10 MIN AMRAP(AS MANY ROUNDS AS POSSIBLE)

Alt. Pistol Squats-5 Reps ea.
Side Hops-5o Reps
Plank Row Knee Tuck-10 Reps
180 Burpess-10 Reps

DIY Beauty Mask

I Tried It: DIY Beauty Mask


Don’t have time to run to the store for a beauty pick-me-up? Food staples you probably already have at home can work in a pinch.

1. Combine 2 tablespoons honey with 2 teaspoons whole-milk yogurt.
2. Warm slightly in the microwave. Give it a good stir.
3. Smooth the mixture onto your face and lie down for 10 minutes.
4. Rinse off with warm water. Say hello to glowing, clean skin.

Do you have a favorite at-home beauty remedy? Leave it in the comments below. And while you’re at it, check out our DIY Beauty Video Gallery for more ideas. 
Photo courtesy of shnnn

Using Citronella Oil


Top 7 Uses For Citronella Oil

Top 7 Uses For Citronella Oil  
Citronella essential oil is extracted from the leaves and stems of different species of lemongrass. The oil is used extensively in soap, candles, perfumes and other cosmetic properties. Citronella oil is usually a clear light yellow to brownish colour and has a lemon citrus aroma with subtle woody tones. If you don’t yet own a bottle, then pick up a bottle of citronella oil here and find out seven wonderful things you can do with this magical oil…

Insect Repellent

Citronella oil is perhaps most famed for its insect repellent properties. It can be used in isolation or combined with other essential oils (such as lemongrass oil) to create an even more potent insect repellent blend. To keep insects away from your home light a candle, allow to burn for a few minutes so a pool of melted wax forms, and then add one or two drops of citronella oil. Alternatively add a drop or two to ribbon and hang by open windows or add a few drops to a cotton ball and place on window sills. If you are moving around and want to be protected then add a few drops of citronella oil and mix with distilled water in a spray bottle and spray in the surrounding area. Alternatively, mix citronella oil with a carrier oil (such as olive or jojoba oil) and rub into the skin.

Skin Care

Citronella oil is effective for reducing oily skin and its anti-bacterial properties help it to fight bacteria that can cause acne. Adding just one drop to water and rinsing the face with the mix is one way to take advantage of this oil. A highly effective acne treatment involves mixing witch hazel and citronella at a one drop per ounce of witch hazel ratio and applying to the face. The astringent properties of the mixture will dry, harden and protect your skin. Read More: Top 5 Essential Oils For Glowing & Gorgeous Skin

Fever

Citronella oil has been used historically to eliminate the cause while also bringing down high fevers. A few drops diffused around the room provides a calming scent which also induces a fresh happy feeling and hope.
Additionally, mix two drops of the oil with a carrier oil and massage onto the stomach, arms and legs.

Deodorant

The lemony citrus aroma of citronella oil make it a wonderful smelling deodorant. Plus, the anti-bacterial properties help to kill potentially foul smelling bacteria. Mix a few drops of citronella oil with coconut oil for an effective, cheap and all-natural deodorant. Alternatively, add a few drops to your evening bath for an odor killing soak.

Toxin Removal

Citronella oil has diaphoretic and diuretic properties which promotes toxin removal, weight loss and the disposal of waste substances. The diaphoretic properties stimulate sweating which expels toxins, excess water, fat and salts from the body and the diuretic properties increase the frequency and quantity of urination clears out toxins, waste substances and drains out infections in the urinary system.

Digestive Issues

Citronella oil has been identified as an effective natural treatment for worms. It should be administered in very mild doses to children and helps to eliminate round worms and tape worms which can hinder physical and mental growth. Citronella oil also tones up digestion, excretion and fortifies the body.

Nuisance Dog Barking

According to research published in the Journal of the American Animal Hospital Association a spritz of citronella spray from an anti-barking collar was more effective and reported as more humane when it comes to preventing nuisance dog barking than an electric shock collar. The veterinarians speculated that “given the dog’s sense of smell, it could be that a strange odor may be less tolerated than a presumably painful stimulus“. If you need to calm a nuisance-barking dog, then try this Petsafe Gentle Spray Citronella Anti-Bark Dog Collar for a more natural and humane anti-nuisance barking treatment.

Where To Buy Citronella Oil

Citronella oil is one of the cheapest essential oils which is great if you want to start using it! I use Edens Garden Citronella Oil which is available here on Amazon for just $5.65 for a 30ml bottle (that’s a big bottle!) Alternatively you can get a 10ml bottle for $2.95 here. Alternatively, another fantastic supplier of essential oils is Mountain Rose Herbs. You can buy their citronella oil at this page (just scroll down a little – it’s in alphabetical order). Pick up a bottle of citronella oil for yourself and try it out for all of the wonderful things it can do for you.

Chicken Stock in the Crock Pot

e

Overnight Chicken Stock in the Crock Pot

Ingredients

  • Leftover chicken bones or carcass roughly equivalent to one small or medium sized chicken
  • 1 onion, peeled and loosely chopped
  • 1 rib of celery, roughly chopped
  • 1 carrot, roughly chopped (no need to peel)
  • 1 bay leaf
  • 1 sprig fresh parsley
  • 1 sprig fresh thyme
  • Salt, to taste
    Note: If you are missing any of these ingredients I wouldn’t let that stop you from making it anyway.

Stock Directions

  1. After removing all edible meat from the chicken put/leave the bones, skin, cooking juices, etc. in the crock pot. If you are using the chicken carcass from the “The Best Whole Chicken in the Crock Pot” recipe just leave every single thing that’s leftover (except the good meat of course) in the crock pot including the original onion and spices you used when making the chicken.
  2. Add the onion, celery, carrot and spices on top of the bones and fill the crock pot almost to the top with tap water (leaving about 1/2” at the top).
  3. Turn the slow cooker onto “low” after dinner and cook all night long or alternatively you could start it in the morning and cook on “low” for 8 – 10 hours during the day.
  4. After the stock is done cooking turn off the heat and, using a soup ladle, pass the stock through a fine sieve to remove all herbs/bones/etc. Either refrigerate or freeze the stock for future use. I usually freeze some in both 1 and 2-cup portions, and I also sometimes freeze stock in ice cube trays just in case I just “need a little” for making sauce or rice.
  5. This stock is great in soups like chicken noodle soup and also in rice like risotto. Enjoy

Benefits of Uva-Ursi

The Weight Loss Benefits of Uva-Ursi

Author: Dr. Edward Group
 
 
Arctostaphylos uva-ursi is small, woody, evergreen shrub native to Europe and parts of Asia. Also known as bearberry, the leaves of this small shrub have a history of medicinal use dating back to the 2nd century. It has been widely used as a diuretic, astringent, antiseptic, and for urinary tract infections. Uva-ursi has many benefits and, in particular, positive effects for those looking to lose weight.
The leaves of the plant are popular with herbalists and contain arbutin, hydroquinone and other chemicals with antibacterial activity. Uva-ursi also contains astringent-like tannins that shrink and tighten mucous membranes, and also reduces inflammation. Uva-ursi also has a diuretic effect due to the ursolic acid and isoquercetin components.

Uva-ursi’s Effect on the Urinary Tract


The hydroquinone derivative, arbutin, is the primary active compound that makes uva-ursi helpful for urinary tract infections. When it is absorbed by the stomach, arbutin splits into a sugar and hydroquinone. The hydroquinone combines with glucuronic acid, creating a compound with astringent and disinfectant properties. When this is expelled from the body during urination, it soothes and reduces irritation of the mucus membranes, and helps fight infection.

Uva-ursi and Weight Loss

Neutralizing urine acidity and increasing urine flow has a side benefit in that it reduces bloating and water retention. This diuretic effect has also earned uva-ursi leaf recognition as having potential weight loss benefits. While the weight loss mechanisms of diuretics requires monitoring, for water weight that won’t easily come off, supplements containing uva-ursi are recommended.
Although losing water weight is not, by itself, a stand alone weight loss measure, uva-ursi has a role within an overall weight loss spectrum that includes other herbs, and can be beneficial.
Although uva-ursi is all natural and has been used for centuries, it should be avoided by women who are pregnant or breast feeding, and those with kidney disease or high blood pressure. Uva-ursi may also increase the anti-inflammatory effects of ibuprofen and other corticosteroids. It should also be taken as directed, as large amounts can cause nausea and vomiting.
-Dr. Edward F. Group III, DC, ND, DACBN, DABFM

Recommended Reading:

3 Different Ways for Baked Chicken Thighs

baked chicken thighs – 3 ways!


Marination is the process of soaking foods in a seasoned, often acidic, liquid before cooking. The origins of the word allude to the use of brine (aqua marina) in the pickling process, which led to the technique of adding flavor by immersion in liquid. The liquid in question, the ‘marinade’, can be acidic with ingredients such as vinegarlemon juice, or wine or enzymatic (made with ingredients such as pineapple or papaya.)[1] Along with these liquids, a marinade often contains oils, herbs, and spices to further flavor the food items.
It is commonly used to flavor foods and to tenderize tougher cuts of meat.[2] The process may last seconds or days. Different marinades are used in different cuisines. For example, in Indian cuisine the marinade is usually prepared with a mixture of spices. (Source: Wikipedia)
Note:  I will try to be as accurate as possible, but not gonna lie – mostly eyeballed it, test-tested and hoped for the best when it came to the amounts of olive oil and balsamic that I put in!!!  I will make these again in the next week or two, and re-jig the recipe to include the exact measurements for y’all.
Marinades (12 chicken thighs total – each marinade was made for 4 chicken thigh pieces each.  You may want to adjust, depending on your quantity)
Balsamic
  • coconut/olive oil – generous amount to coat
  • balsamic vinegar (equal parts oil and vinegar)
  • 3 shallots – finely chopped
  • 3 garlic cloves – crushed
  • 2 tbsp grainy mustard – good quality
  • coarse sea salt and ground pepper
Lemon
  • coconut/olive oil – generous amount to coat
  • 1.5 lemons – squeezed
  • 3 tbsp Italian seasoned herb mix (dried basil, rosemary, thyme, oregano, black pepper)
  • 3 garlic cloves – crushed
  • coarse sea salt and ground pepper
Smoky
  • coconut/olive oil – generous amount to coat
  • 2 limes – juice squeezed
  • 3 garlic cloves (minced)
  • 2 shallots or small white onion- finely sliced
  • handful of fresh cilantro – finely chopped
  • 2 tsp ground chipotle
  • 2.5 tsp of chili powder
  • coarse sea salt and ground pepper
Prep
  • for each individual marinade – measure and pour all ingredients into a large Ziploc bag
  • add chicken thighs into the bag and zip closed
  • use your hands to shake and ‘massage’ the marinade mixture into the chicken pieces
  • allow to soak and absorb all the flavours for at least 2 + hours (I let marinade for 24 hours – the longer, the better)
  • when ready, preheat oven to 350 degrees
  • remove chicken thighs from bag, and place in a single layer, in an oven-proof dish (Corningware), covering with the liquid marinade
  • bake for approx. 30-45 minutes, until juices run clear (watch them, as you don’t want to overcook/dry-out)
  • broil for an additional 3-5 minutes if you want the outside crispy (optional)
  • remove, set aside and serve
  • enjoy!

DIY Skin Brightening Toner with Lemon Juice

Ingredients:

1/2 Cup Lemon juice
1 Cup Water
2/3 Cup Witch hazel (can purchase at any drug store)
Plastic bottle or jar
Facial toner recipe for those with normal to dry skin.

*For oily skin add 2 Tablespoons Alcohol*
STEP ONE: Mix ingredients in a bottle or jar.


STEP TWO: Cleanse skin with facial cleanser and rinse. Repeat.
STEP THREE: Apply toner with a cotton pad, sweep upward and outward over entire face and neck.
STEP FOUR: Apply moisturizer.
Benefits:
Witch Hazel: Tightens pores and reduces inflammation.
Lemon Juice: Reduce blemishes and lightens skin.
Use facial toner both morning and night for a deeper cleanse, smaller pores and bright, radiant skin!
*If you have any questions about toner or other skin care needs, please feel free to ask :)

DIY How To Get Your Natural Hair Color Back


03-29-12 hair dye

How to Get your Natural Hair Color Back

Sometimes it’s fun to change hair color, it gives us a sense of change and a unique way to express ourselves. But what happens our sense of adventure wears off and you want your natural hair color back? Well lets roll up our sleeves and look at our options.

The Waiting Game
Patience is your best ally if you have colored your hair with a temporary, semi-permanent, or demi-permanent hair color. These types of hair colors will wash out over time. On the other hand, permanent hair color is permanent and will fade, but it will never wash out.
Here is a list of approximately how long you can expect each type of hair color to last until your natural shade of hair color returns.

Temporary hair color – Lasts until the next shampoo
Semi-permanent hair color – Lasts anywhere from 5-12 shampoos
Demi-permanent hair color – Lasts up to 28 shampoos
Permanent hair color – Lasts forever

How to Artificially Achieve your Natural Hair Color
Don’t want to wait? Here are the DIY how-to on how to get back to your natural hair color results at home.
Determine your natural level and tone. The level describes the lightness or darkness of your hair, and the tone is the shade of the hair color. You can determine these factors by comparing your new growth to swatches of hair color in a beauty supply store.
Next, Determine the level and tone of your current hair color.
Calculate the difference between your current level and your natural level.
Compare both tones to determine which shade of hair color will compliment or neutralize your current tone. For example, if you currently have ash blonde hair and would like to return to a natural brown shade, use a hair color with red tones to neutralize the ash tones.

Tips to Remember
New growth has not been exposed to as much sunlight as the ends of your hair. So you’ll need to compensate to insure the most natural results, choose a hair color that is one level lighter than your new growth color.
Hair that is more than two levels lighter than your desired level may have to be filled to create rich, natural looking results.
Hair that has been artificially colored darker than your natural hair color will have to be lightened first because hair color will not lighten artificial hair color.
When in doubt get some professional advice from the beauty store team member, the 800 number on the product box, a hair stylist or a hair colorist. The further away you are from your natural hair color you are the trickier this becomes.
If your attempts don’t go as well as you hoped go to my article Hair Color Dyes Gone Bad? Hair Colorist

Spatchcocked Chicken

How to Roast a Spatchcocked Chicken

Roast Spatchcocked Chicken | Chicken Recipes

The first time I heard the term spatchcocked, I had to laugh. It is, after all, a ridiculous name. But once I came to understand exactly what it was, I became very interested. I still laugh; I can't help myself. The point behind spatchcocking is to flatten the bird so that it cooks quickly and evenly. With that in mind, they should probably change the name to splat-cock. Tee-hee! I'm not entirely sure of spatchcock's origins as there is no mention of it in Larousse Gastronomique or any other of my reference books. It has a significant web presence, but its origins are a mystery.
The quickest way to flatten a chicken is to remove the back bone and crack the sternum in two. The first two steps of this article illustrate how this is done.

Roast Spatchcocked Chicken Recipe: Backbone Removed and Flattened then Roasted Quickly with Salt and Pepper

remove the backbone of the chicken
1. Cut out the backbone of the chicken using the poultry shears. A good pair of shears should make short work of the hollow bones. Notice how the cut gets a little wider at the hip as you must cut between the joints of the thigh and hip. Follow the backbone all the way up to the neck and back down the other side. This large chunk of chicken could be saved for making soup stock, if you're into that sort of thing. You should be.
flattened spatchcocked chicken
2. Next, flatten, or spatchcock, the chicken. Do this by spreading the two sides of the chicken as if you were opening a book by pushing down real hard on either side. You should hear some cracking as the shoulder/breast bones snap. At this point you have two choices: roast it as is, or remove the rib bones and the breast cartilage. When roasting, it doesn't really matter—it's up to your personal preference.
roasting the spatchcocked chicken
3. Preheat the oven to 500°F and get the spatchcocked chicken ready to roast. Now that the chicken is opened up, you can easily apply seasoning directly to the meat. Rub in your preferred herbs and spices underneath the skin and around the newly exposed insides. Finish the whole thing off with a light coating of vegetable oil. The oil will help the skin to brown. Once the oven is up to heat, immediately lower the heat to 450° and roast the chicken for 30 minutes.
continue roasting the spatchcocked chicken
4. Check the spatchcocked chicken and roast for another 20 minutes. Rotate the pan and drop the heat to 375°. Make sure that your oven is performing properly by double-checking the oven temp with an oven thermometer. The skin of the chicken should be turning a nice golden brown, which is why we cooked the chicken at such a high temperature initially. Now we move to the primary roasting stage. This stage is not really measured in time, but by the internal temperature of the chicken.
roast spatchcocked chicken resting
5. When will the spatchcocked chicken be done? It may take an hour or more to finish cooking the chicken. The best way to know when it's done is to use a thermometer with a detachable probe that will monitor the chicken while it cooks. These thermometers come with temperature alarms that go off once the desired temperature has been reached. For chicken, that temperature is 161°. Once you remove the chicken, let it rest for 15 minutes before slicing into it.

Tips and Tricks

Use a roasting pan with a rack so the underside gets cooked, too.
Don't open the oven while the spatchcocked chicken is roasting. It decreases the temperature and will significantly increase cooking time. Use your oven's window, if it has one.
If you want to make gravy from the drippings, start with a dry roasting pan and deglaze it on top of the stove. If there is a lot of grease, you can mix it with a roux to thicken the gravy.
Oven thermostats are one of the first things to fail on any oven. This can be checked by keeping an oven thermometer inside your oven.
Monitoring the internal temperature of the chicken while it roasts is the best way to know when your chicken is done. Stick the probe in the thickest part of the breast from the side.
If you look at the picture in step 3, you may notice that the legs have been flipped over. This was done because it was my belief that it looked better. However, it is possible that the chicken would have roasted better if I had left it like the picture in step 2. The way I did it here, the skin on the thighs didn't get very crispy. I believe that if they had been left the other way, the skin would have been much crispier.

 
Copyright © Healthy Natural - All Rights Reserved
Proudly powered by Blogger